
Jackson Greer & Jack Manning
Project Overview
Project Elevator Pitch:
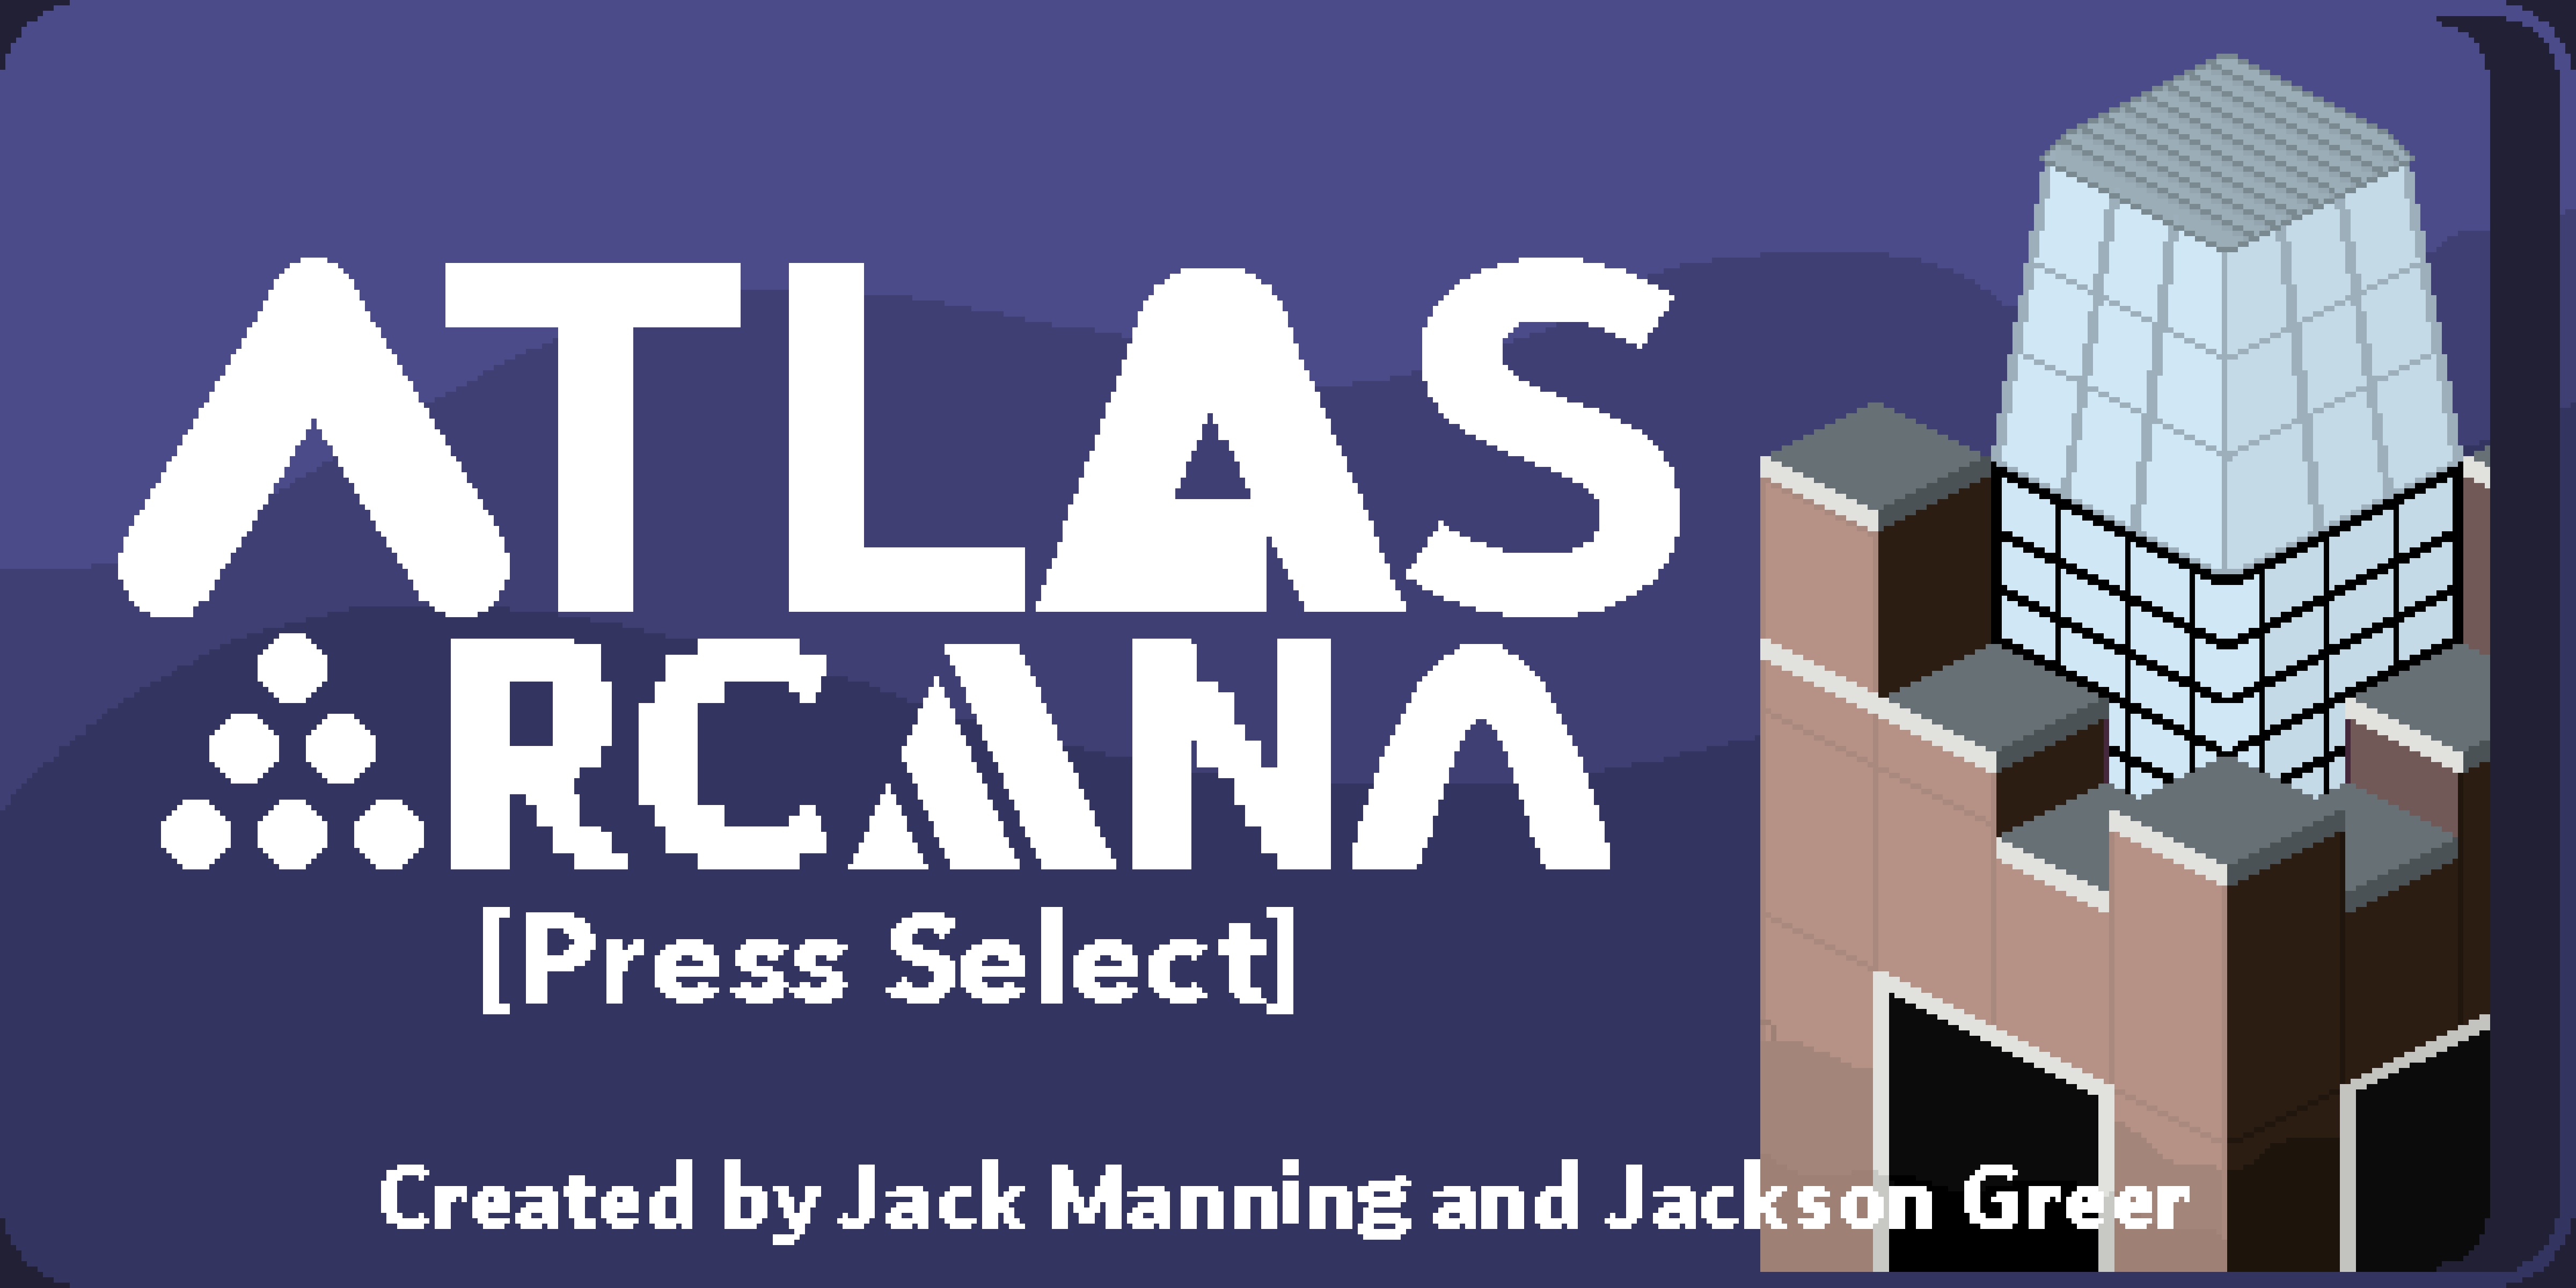
The ATLAS Arcana is a playful orientation of the CTD program and the ATLAS building as an isometric video game that utilizes mixed interface puzzles to create a sense of community for students.
Project Goal Statement:
The goal of ATLAS Arcana is to create an interactive and enjoyable tour experience for new and transfer students that leaves them content and more informed about the building, rooms, and the program’s offerings.
What is CTD and Capstone Projects
Creative Technology and Design (CTD) is a unique major offered by the University of Colorado, Boulder (CU Boulder). The CU Boulder College of Engineering and Applied Science claims that CTD students will explore projects, “creating games, mobile apps, websites, robots, or internet-connected devices of all kinds, to exploring visual communication and design.” They also claim, that “the transdisciplinary BS in Creative Technology & Design infuses creativity into engineering and technology”. Like many college majors, CTD undergraduate students are expected to complete a capstone project, a final culmination of students undertaking. The sample curriculum states that “In their final year, students must complete 7 credit hours in the two-semester Capstone sequence. This sequence begins with Research Methods & Professional Practice and culminates with the Capstone Projects class. This sequence is designed to allow students to put into practice the technical skills and creative concepts that they have acquired throughout their undergraduate career and also make important professional connections.”
Research Methods and Professional Practice
Research Methods and Professional Practice (RMPP) is the second to last class offered in the undergraduate program of the CTD program. Graduating undergraduate students are expected to take this during their final fall semester. The purpose of the class is to prepare students for their capstone projects course, intended to be taken the following spring semester. CU Experts defines that class as one which “lays the foundation for students to produce culminating work in their major. In this course, students will engage in domain exploration, learn to define a research problem, utilize tools and methods for professional design research, refine presentation skills, and engage in iterative and collaborative work. This course is focused on domain research, idea validation, and prototyping in order to prepare students for a culminating semester-long Capstone project based on this research.”
Taught by Sheiva Rezvani and Annie Margaret during the Fall 2023 semester, Jack Manning(jackmanuelmanning@gmail.com) and Jackson Greer (greer.jackson.t@gmail.com) formally met to complete the capstone project. At the beginning of the course, they had different individual project ideas. Jack Manning intended to create a game/data visualization tool that simulated CTD student outreach by showing where CTD students go on an isometric CU Boulder Campus. Jackson had originally intended to create a game about organizing groups to solve climate-based problems. However, when groups were officially formed about halfway through the semester, Jack and Jackson got together and created one refined idea. The idea they came up with was ATLAS Arcana. Although the name itself didn’t come till much later in the project, for consistency, the project will be referred to as ATLAS Arcana at all stages.
ATLAS Arcana was intended to be a game, aimed at new and transfer students of the CTD program, where students could explore the building and solve puzzles. The game was intended to be a sort of tour, with game elements such as puzzles, an inventory, and even a boss fight easter egg. They originally defined the project with the following elevator pitch:
“The ATLAS Arcana is a gamified orientation of the CTD program and the ATLAS building which utilizes mixed interface puzzles to fast-track a sense of community for students. This game will be hosted in the ATLAS building within an arcade cabinet built by our team.“
RMPP also allowed Jack and Jackson to plan out a variety of aspects, such as the division of work, early in the project.
“Since we are similarly trained through the same program and courses, neither of us has a particular skill that separates us from the other. For this reason, we have chosen to be equal co-developers of this game. All parts of the project will require both of our inputs and we will take on equal responsibility. We will hold planning meetings to outline the workload we can reasonably accept and will hold each other to a high standard.
RMPP also allowed for vital testing to be conducted before the capstone semester began. This included storyboard testing as well as ensuring that Jack and Jackson were capable of using Unity as their primary game engine and Aseprite as their primary art creation tool. It was also at this point that Jack and Jackson agreed to create all original art for the project. Lastly, it is important to mention that at this point, they set the “stretch goal” of creating a full-scale arcade cabinet to house the project. In RMPP they planned a bill of materials for the cabinet, but knew it was a stretch goal at the end of the day.
The original documentation, submitted as the implementation plan for the RMPP final can be found here and the final presentation, given to faculty at the end of the semester can be found here.
Game Design and Development
Taken during the same fall semester as RMPP, Jack and Jackson also worked together on a prototype version of ATLAS Arcana in their Game Development course. This is also where they met Peter Gyory (peter.gyory@colorado.edu), their instructor who would later become their primary capstone advisor.
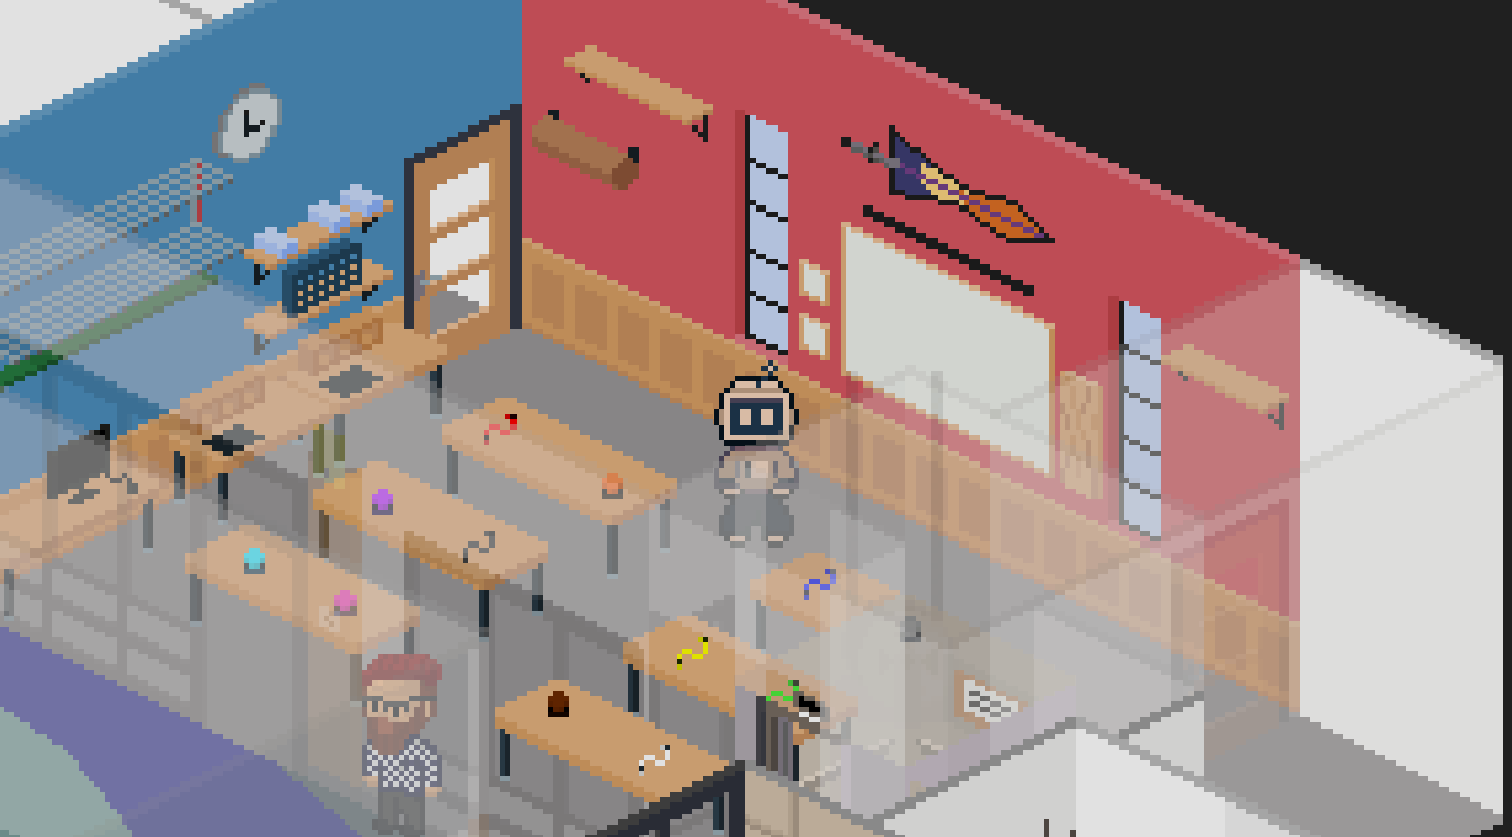
The primitive version of ATLAS Arcana was used as the final project in Game Development. It featured a small-scale, puzzle-solving game, where the player moved around in an isometric pixel art rendition of the “Blow Things Up Lab”, a maker space for CTD students. The scale was more detailed than the final version later, but for a small-scale puzzle game, this version worked. There was also a unique isometric problem, which had to be solved manually in this version. This wiki goes more in-depth on that problem and its eventual solution in the Unity: Custom Tools section. In short, the project was meant to demonstrate the feasibility of a project like the proposed capstone, but also to build many of the core systems early.
Many of the core systems such as the inventory system and dialogue system were either scrapped or largely reworked down the line. However, the test proved that the group could successfully work with Unity and Aseprite to create an isometric rendition of the ATLAS Building and the CTD program.
The ARG Dilemma
This project presents an interesting dilemma as it pertains to the game's intended audience. The dilemma is that the game features ARG puzzles, which force the player to leave the cabinet. During that time, while the player solves a puzzle, someone else may come to play the game and is inevitably confused by a game in progress with no introduction. The team discussed many solutions to this problem including a backpack housing the game that could be moved around with the player and even organizing teams. Ultimately, they settled on having more than one cabinet so more people could play together, and having players work in teams so one could explore in game while the other ran around the building solving puzzles.
Unity
Custom Tools
Throughout the creation of this project, we realized that the amount of time we had during the capstone and the scope of objects we wanted to create was slightly imbalanced. Recreating the entire building alongside detailed furniture within the time frame was going to prove a difficult and tedious task. To remedy this we created a custom Unity tool that would run in the editor and create the custom-shaped polygon colliders we required to restrict player movement as well as handle the order-in-layer issues discussed later in this wiki. Both of these colliders needed to adhere to the strict angles imposed by the isometric viewpoint, and creating these colliders manually would have taken days if not weeks on its own. Our custom tool took in a single variable on a slider, the x offset of the bottom vertice of these rectangles, and used that value to calculate all 7 other vertices for these colliders. As you can see in the photo below the bottom collider maps perfectly to the unwalkable area for the player, using the initial x offset value, the consistent slopes of the connecting lines, and the width of the sprite image. The second collider is then based on the initial one, sharing the same x value for the top vertice and using slope math to find the connecting pieces, this collider catches the player and sets them to the proper “order in layer”, making it seem as if they are behind the object in question. The small offset is to ensure that there are no stacking collider bugs and that the game runs smoothly.
Combination Lock
Drawing on Jack's experience in Game Design and Development a simple combination lock system was implemented for the first puzzle in the ATLAS ARCANA gameplay loop. Given that the ATLAS ARCANA is a single scene game a popup subsystem was created as a child of the camera and populated with information based on the current puzzle being solved. The combination lock remaps the players movement so that the left and right moves them between the 4 possible numbers and clicking select increases the number. The player can exit the puzzle at anytime or are automatically exited out once the correct solution is inputted.
Button and Wire
The game features a puzzle, nicknamed “The Button and Wire Puzzle”. It has the player pick up different colored buttons and wires in the game. Each time one is picked up, the old one is dropped and the player can carry one of each. The idea is that the player would go into the space in the real world, determine which color button and which color wire they would need, and then pick those two up in the game. The system works by giving each button a wire a child script that defines if they are a button or a wire and their color. When a button is picked up, it checks what the player has already (if they have one of the other items) and then sends a dialogue to inform the player of a successful pickup, as well as update the currently held item. When the right two are grabbed, the door disappears, revealing a new area to the player.
Movement
The ATLAS ARCANA is an isometric 2D-pixel art game that was created to have an old-fashioned retro feel. To accomplish this classic 8-directional movement was implemented with a slight tweak. To ensure the player could follow the paths of the hallways in our isometric view we edited the movement code to alter the angle for the diagonal movement from the 45-degree angle that classic 8-directional movement uses to one that more closely resembles our isometric view. This allowed players to hold a diagonal direction and follow the isometric angles perfectly without bumping into walls.
In the movement section Jack also created a custom animator for the main robot character. All of the walking sprites created for this character follow the same 8-frame rhythm and to smooth out the walking look of the character the animator handles transitioning between frames on a more complex level than Unity’s standard sprite animator. Each time a player switches directions the step that they were just on is passed to the new directional sprites, making it look like the character turned mid-step instead of restarting the entire walk cycle. This alongside 8 directional idle sprites allows the player to move around and pause in any direction without anything feeling clunky or unpolished.

Arcade Controls
The arcade controls used to control the game are these from Amazon. Originally tested by Jackson during the Game Development and ATLAS’s Alternative Arcade Interfaces course, they serve as a simple way to use arcade-style controllers for a Unity game. When connected to the included USB Encoder and plugged into a computer, the joystick and buttons act like those of a normal controller. Then Jackson modified the Unity code to take controls from either the keyboard or the controller. This video by Brackeys served as the primary instruction for the coding aspect.
There were a few complications that were worked out. Modern controllers do not work the same as this arcade joystick. The main difference is that joysticks on modern controllers can be recognized independently of their controls. This means that you can reference the stick itself and use the Input.GetAxis with the joystick with no problems. Jack and Jackson originally used GetAxis for the movement of the player since it automatically connects to the WASD keys. However, once the controller was connected, it was realized that the joystick did not act like a modern controller but instead acted like a series of 4 directional buttons. This meant that the GetAxis control system no longer worked. Instead, the directional buttons could only be managed via an on-and-off boolean. The buttons were either pressed or not pressed at any given time. This also meant that inputs involving a single press, such as an Input.GetKeyDown which only returns true for the single frame the key is pressed down. To mitigate this, a class called ControlManager was created which could be connected to all things that require controller input. Then, if a button was pressed, or a joystick moved, it would switch on, the action would be handled, and then the performer of the action would be the one to switch it back off. So if a dialogue box was initiated, the player would hit the button, the controller manager would switch the button boolean to true, the dialogue box would read that true and engage, and then the dialogue box would switch the boolean back to false, mimicking a single frame button press.
Hint System
In the original Game Development version of the game, objects were shown to be interactable by highlighting when the player got close to them. On the scale of the final project, this system simply did not work. The way that process worked required the creators to create a highlighted version of every interactable sprite. Then each sprite in the game would have to have an extra collider that checked when the player was close, and swapped sprites when the players got close. On the full scale, this is not manageable. Instead, inspired by the hint system in the game Chants of Sennaar, when the player holds the back button, indicators appear above every interactable object. This is not only more manageable and scaleable but allows the player to explore on their own without forcing the hint system.

Menus
The main menu and credits menu are very simple. Both menus feature a class called the SceneHopper that takes in a scene name and simply jumps to that scene when the select button (one of the arcade buttons) is pressed. The main menu was inspired by the evolution of the creators' pixel art abilities throughout the project, as one of the first pieces of art done in the RMPP course was a small rendition of the building. It had few colors and a low resolution. The home screen was meant to show how far the creators had come when it came to their artistic ability. The credits were also created rather interestingly. Using the AI Chat GPT 3.5 and 4, Jack and Jackson took the names of testers, mentors, and other important individuals from the project and asked them to create fun “titles” for each of the characters. This bulked up the length of the credits as well as creatively honors the people who made the project possible.
The game also features a “reset” button, which uses code very similar to the SceneHopper, and resets the game to its original state when pressed. This is only available through a keyboard and was intended as a behind-the-scenes button for project demonstrations.
Layering
Layering was one of the first and most complex issues Jack and Jackson faced during the development of the ATLAS ARCANA. To accomplish a fully isometric view while keeping the overall workflow clean in Unity’s 2D system was an enormous task but the project’s feel and walkability depended on it. Unity did not provide any out-of-the-box solutions for this project so a complex script was required. Early on in the development process, this code was simply coined “The Script” as Jack quickly realized the project’s overall structure hinged on making this functional.
The decision was made to have the player shift between different sorting orders, moving in front of and behind objects while all other objects remained stationary. Jack and Jackson had planned for tackling this problem however and already had an incredibly useful tool at their disposal. Utilizing the Custom Collider tool described earlier, functionality was added that would automatically sort all objects unless marked exempt, for this system to work almost every single game object across all 3 floors required a unique “order in layer”. This expedited the development process even further, preventing either developer from spending hours hand-sorting all game objects. This functionality was finalized by automatically sorting all objects based on their y position unless they had the “Exempt” tag, to handle unique edge cases, and sorted them using every other sorting layer. This ensures that two objects directly next to each other would have a gap in the sorting order between them, the perfect gap to place the player. The trigger collider on each game object from the custom tool and the collider at the player’s feet were all “The Script” needed.
The script is running constantly and handling the player's exact position in the ATLAS building using a handful of tricks. Its core functionality runs as follows. Firstly the player has an array of game objects that it is meant to be behind, with any object being added when the player enters the trigger collider created by the custom tool and removed when the player exits. Then, after any update to this array, a function is run that loops through all game objects inside of it and grabs the lowest order in the layer available, as the player could be behind a multitude of objects at any given time. After this function determines the lowest value the code sets the player’s order in layers to that value - 1, fitting perfectly inside the gap that was already created.
Opacity Grouping
Dynamic opacity handling was a requirement to allow players to be able to see their character no matter where they walked in the building. While initially, this functionality was part of “The Script”, Jack realized using the same tools would lead to some unfortunate side effects. If every single object was being placed at a reduced opacity based on its collider, each wall would flicker to its low opacity state at a slightly different time, adding a large amount of visual clutter and confusion. To remedy this a second script was written that would utilize the floors of each room and set the walls and required objects to a lower opacity as a group, limiting the amount of visual clutter and adding some much-needed clarity to the game. Each floor sprite knows its surrounding walls and upon the player entering they are all set to their low opacity state, returning once the player exits the space. With some edge cases where certain objects should be at low opacity in 2 separate spaces being handled to ensure no visual bugs were present.

Dialogue Quiz and Dialogue Quiz
The dialogue system was mostly inspired by this Brackeys video. The system itself went through many changes throughout the project, especially during the second half of the semester. It was plagued with weekly bugs and special cases. However, the resulting system is not only neat, but scalable, and easy to set up for new dialogue characters.
The dialogue system is broken into three parts: the dialogue box (universal), the dialogue quiz (universal), and the dialogue sender (individual).
The process starts with a dialogue sender. Every object that is interactable for dialogue needs a sender. Since the sender requires a collider to determine if the player can interact with the box, it needs to be a separate child object of the character. In the code, this is written out as SelectableForName. The dialogue sender stores all the information required for dialogue, including the character name, main dialogue, if there is a question after the dialogue (quiz), the pre-quiz dialogue, the post-quiz dialogue if the question was answered correctly, the post-quiz dialogue if the answer was incorrect, the four answers to the quiz question and the correct answer, and the quiz question itself. Aside from storing this information, the dialogue box sender serves core functions that are meant to be checked on an individual character basis. Mainly, the sender is the one who calls upon the dialogue box to display the dialogue. The sender also contains a hefty function that figures out what stage of conversation the player is on and then sends the proper dialogue to be displayed. For example, the first time a player talks to a character they will display their main dialogue. However, if the player has talked to them at least once, and they have a quiz afterward, the function will check to see if the player has talked to the other people to get the information and display different text accordingly. This brings up the third function, pre-quiz checks. The function of the sender is to ensure that the player has talked to the necessary characters before continuing to the quiz. If the player has not talked to the right people before trying to access the quiz, the game will inform the player that there is more to be done before they can continue. The sender also features a coroutine that buffers for a second to ensure that the player does not call the dialogue box while in motion, preventing a bug where the box tries to rise beyond its intended stopping point. Lastly, the sender handles dialogue differently after a quiz has been answered, handling the number of conversations and dialogue accordingly.
The second aspect of the dialogue system is the dialogue box. This is a universal object that is called upon by a sender to display the information. It is rather simple when broken down and follows many main aspects of the Brackeys video linked above. In essence, it is broken into a few functions that work in order rather obviously. To begin, StartDialogue takes in the dialogue given to it by the sender and loads it into a queue. It also marks that a player is in a conversation, important for preventing the box from being called again accidentally. Lastly, starting a conversation also sets the display name so that the dialogue is being spoken by a specific character as well as setting the dialogue box and canvas movement targets. Nailing down the movement distance in terms of variable screen sizes was difficult and required some easily modifiable variables. The StartDialogue function sets the target above the box and the box rises into the frame so the player can read the text. The next function is DisplayNextSentence which waits for the player to press the continue button, dequeue the old sentence, and type out the new sentence. Instead of having the text display all at once, the Brackeys video demonstrates a method that allows the text to type character by character as if it is being typed. This is controlled by a coroutine called TypeSentence which displays a character, waits 0.02 seconds, and then displays the next until the end of the string. Since this is a coroutine, before the DisplayNextSentence begins typing the next sentence, it must stop all coroutines to prevent overlapping. The final function of the dialogue box is the EndDialogue function, called when the sentence queue runs out. This sets the target of the box and canvas back down below the frame. It also checks if the player has talked to everyone (pre-quiz checks from the sender) and starts the dialogue quiz if everything checks out.
The third and final element of the system is the dialogue quiz. This series of sprites and canvas elements sit in the center of the screen, hidden until called upon. If a dialogue sender is intended to quiz the player at some point in the conversation, the dialogue box takes all the information about the question, the four possible answers, and the sender's name, and displays them. It then takes note of the answer, given as a character for the creator's convenience, and converts it to an index. In short, the system keeps track of which answer the player is “hovering” over by keeping track of which index they have selected. For example, if index 1 is the top left box of the quiz, then the program will replace the dark red color of the box with a lighter red to show that it is being hovered over. Then if the player presses down on the controller, it will move the selected index to 2. The program then brightens the newly selected box and darkens the old unselected box. Since it is only a two by two grid of answer choices, the program manually knows which box to go to if input is pressed from a certain space. Since index 1 is the top left, it knows that down leads to index 2 and right leads to index 3. If the player selects an option, the program will check if the selected index is the same as the correct answer integer and will either send the sender an “answer correct” signal or an “answer incorrect” signal. The sender will then process that information and recall the dialogue box to display the result.
There are a slew of custom functions with minimal functionality meant to perform small tasks based on the completion of the quiz. In essence, these functions connect to the sender and the quiz, and wait for the moment the quiz is correct and the quiz name matches the sender name. This means that the player got a specific quiz correct and an action can be performed. Some of these actions include removing a character or collider blocking the path and fixing the broken elevator. These functions allow for the expandability of the quiz system while leaving the core system intact.
Tripwires
While slightly unnecessary to talk about, tripwire functions allow for the game to have just a little more life and provide the player with information that might not otherwise be communicated. Some tripwires move colliders and objects to block the player into an area until something is completed. Other tripwires force dialogue to spread messages about nearby real-life programs. Some tripwires even cause the screen to shake to enhance the “life” of the game, making it feel as though things are happening in the world.
Elevator
When the project was in the early stages, the idea was that the entire building would be built on top of each other, and the main mode of transportation between floors would be the stairs. As the player moved up or down the stairs, the floor above or below would phase in and the current floor would phase out, so only the floor the player was on would be visible. This idea had a lot of complications, such as difficulty determining if the player was actually on the stairs, or simulating the effect of the player going up the stairs and not just walking over it. Eventually, the idea was simplified to use the elevator as the primary mode of inter-floor transportation.
There were a lot of ideas for how the elevator should work, from jumping directly to the floor above or below to having the screen blackout around the elevator to make it look like it was moving, the team ultimately decided that a Wonka-esque flying elevator that rises into the floor above it. When the player steps in, they can activate it with the select button, choose a direction, and then move in that direction. The elevator moves a set amount and locks the player's movement. Since the floors are adequately separated, there is no need to phase entire floors in and out. The elevator also keeps track of “game stages” and can prevent movement based on the stage of the game you are in. For example, on the top floor, the elevator breaks until the player solves a puzzle, thus the elevator goes to a new game stage to prevent that movement.

Aseprite
The Building
The largest pixel art requirement for the ATLAS Arcana was the ATLAS building, specifically the 3 floors that the average student will find themselves in throughout their college career in the CTD program. While this was a major scope concern for the project, Jack and Jackson began the pixel art creation process intelligently. Using blueprints of the building to ensure all rooms would be built to scale, and limiting the amount of time spent on making all of the rooms fit, the process began quickly. Originally, they had attempted to use a large-scale, 16-pixel edge length per square on the blueprint. However, they realized this was too big for the original character sprites. They then mathematically calculated the proper scale, ending up around 9.5 pixels per square edge. They rounded this to 8 for easier math and a more fitting scale.
After the core structure of the building was made Jack and Jackson began designing one room at a time, beginning with the areas they knew had to be walkable. Despite there being over 60 rooms and hallways not all are meant to be walkable and interactable. Beginning with the highest priority spaces ensured that the entire project would be completed on schedule.
The Player Model
The player model was created by Jack, created as a robot to represent the technical aspects of the CTD major and provide an identity-free character to ensure all players felt welcome. This custom sprite, alongside its custom walk animations, was created to fit into the building space that had already been created and lean into the low-resolution pixel art style Jack and Jackson envisioned this project taking on.
Characters
During the player model phase, a blank human model was created. The blank human model had versions facing both left and right. The intention was that Jack and Jackson could make a copy of the blank, crop out the direction they did not need, and then paint the character over the blank. While the body's size was reworked since the version from Game Development, the head remained the same, allowing them to reuse three sprites partially. They knew they wanted to feature faculty members in the game, allowing players to interact with staff members and professors and learn about the classes they teach.
This process began with a formal permission email, sent to core staff members requesting their permission to be in the game, as well as a few sentences about themselves and their classes to be used as dialogue later. This system was a success, gaining almost all faculty permission. For the most part, character creation was simple, finding ways to exaggerate distinct features of characters such as hairstyles, or accessories. In total, the team generated 13 characters for the game, from faculty to NPCs, and even themselves as random bystanders to be interacted with.
ARG Puzzles
Ideation
When they originally came up with the idea for the game, the intention was that new and transfer students would be able to understand their place in the building. The creators have the idea to incorporate puzzles in the game with solutions at that respective place in the real world. The intention was that this would force players to explore the building, discovering spaces that are common for students to hang out, and that are often not known about by new and transfer students. The puzzle answers were meant to be simple, with number codes, or names, or color combinations that could be entered into the game to get past roadblocks.
Originally, the ARG puzzles were complex. Some had a pulley on one side of the room that lifted the answer on the other side of the room, others had colorful projector sheets that revealed answers when laid on top of colored paper. In short, they were complicated and while they did get people into those spaces, they created another aspect of the project that was unrealistic to take on. At that point, Jack and Jackson realized that the important part was getting people into the spaces and less about the crazy novelty of the ARG puzzles themselves. At this point, they dropped it down from 6 complex puzzles to 4 simple ones highlighting the main spaces for students. These include a code on the wall, a short treasure map, a jigsaw puzzle, and a telephone with a colored wire and colored buttons.
Another important aspect of the ARG puzzles was figuring out the symbol. In the game, there had to be some obvious bright symbol to show players that the solution to the problem was in the real world and not hidden in the game. The creators went through two rounds of user testing to find the best symbol to represent this. They also included a hint about the indicator on the arcade cabinet itself. The hope was to make it as clear as possible that the player needed to go to that spot to find the answer.
Puzzle Code
In the lobby of the building, there is a code hanging on the wall. This acts as a sort of tutorial, giving the player an easy puzzle, with a simple answer, in the space they are already playing in. This reinforces the idea that the puzzle is in the real world, and not in the game. To create this wall hanger, they originally cut it out of acrylic. However, the heat and time of the cut badly warped the code, which was eventually accidentally snapped by Jackson shortly after it was removed from the cutter. They then cut a small one out of wood, until finally recutting it a third time out of a larger cut of wood, and then staining it light gray.

Jigsaw Puzzle
The jigsaw puzzle was designed in Illustrator and went through a few rounds of testing before it was ever fabricated. The idea was that the puzzle would be a nonsense poem in old-style letters with a password embedded in it. Letters making up the password were bolded in a more aggressive font. However, it was hard to read, and sometimes hard to understand what the final code was. It was redesigned with a larger font and bolding on the password characters. Ultimately, it was cut out of a sheet of acrylic, and glued onto a stained sheet of wood. The black stain of the sheet prevents shadows that would otherwise come from the acrylic engraving.

Treasure Map
The treasure map was created using a ttrpg mapmaking software called Inkarnate to utilize it's build in library of parchment style assets to create a pirate themed treaure map. Set up in one of the basement classrooms in the ATLAS building it serves as another unique way to allow a player to interact with the physical building and take that clue back to the ATLAS ARCANA game. Printed out and aged with a tea bag and some light flames to make it appear more old fashioned the map comes alongside a lasercut ARG indicator to help students understand that it is part of the game experience despite it's aged appearance

Telephone
The Telephone clue serves as the solution to the BTU button and wire puzzle as a unique sculpture piece. The entire object is created out of wood and handmade by Jack Manning. Designed to mimic an old fashioned phone booth with a colored button and wire while being a large interactable sculpture.

Testing
When it came to testing ARG puzzles, the team's peers in their capstone course were invaluable. Many puzzles were tested with this group as well as separate students outside of the class for clarity. Some puzzles were edited because of these, changes which are listed in the fabrication section above. Another small test was what the team calls “time testing”. Simply put, they tested the amount of time it took for players to understand and solve the puzzle, as they didn’t want to leave the cabinet unattended for too long. This problem is further discussed in the ARG Dilemma section.
At this point, it is also important to mention that the team felt there was a need for a unifier. Since each puzzle looked so different, both in material and color, Jack and Jackson wanted to make sure it was obvious that each puzzle was part of the game. To do this, they used the same ARG indicator that the player sees in the game. On some puzzles, it is laser engraved into it directly, and in others, it is a separate piece that is to be hung on the wall alongside the puzzle.
Expo Content and Documentation
Arcade Cabinets
When the project was in the ideation phase, the team planned to build a full-scale arcade cabinet to hour the game. The idea was that a monitor would act as the screen and a separate permanent computer would house the game full time. However, this idea had a lot of cost issues, time restraints, and more work on hardware and simple computers than was necessary. Similar to the ARG puzzles, the team simplified the idea to something that still demonstrates the important aspects of the project, without creating a full-size cabinet.
At one point in the ideation process later in the capstone semester, they had discussed with their mentor Enrique, an idea for a small cabinet that could be carried on the back of a player, inspired by this UCLA project. This idea was novel and allowed the cabinet to move with the team as they searched for the ARG puzzles in the real world. However, this idea had weight and power questions, as well as a problem with monitoring the machine during the expo.
Finally, the team settled on making 2 identical, small-scale, tabletop cabinets. These house a monitor sideways so only half the screen is visible, and the creator's laptops could be placed behind to run the game behind the scenes, without having to worry about the weight or the power supply.
On a Saturday toward the end of the semester, the team got together and pushed the cabinets to about the 60% completion mark, finishing and testing them over the next week.
Stickers
In collaboration with the ATLAS Sticker Machine, a project by Quinn Pearson, some of the professor and staff character designs were vectorized to be used as stickers.
Video Documentation
As a part of the documentation process, the creators wanted to make a short video. To begin this process, they made a basic shot list and a short script. The video was intended to be short, between one and two minutes. This video was created to serve as a high level overview of the final product, a tool to create excitement for the project and explain the overall motivation for the ATLAS ARCANA.
The Wiki
When it came to the final documentation, Jack and Jackson had a serious discussion. While most game development processes are shown off as in depth development logs in video form the team felt that a high fidelity video element should be more focused on the final product and a wiki-style website could show off all of the details of the project. Playing to the team's strengths, Jack and Jackson wrote this wiki to serve as a tool for those who want to know more about the project's overall development and as a platform to describe the entire process in more detail.